
Building a Lithium-Ion Battery Bank
Why Build a Battery?
I have recently been building a solar-powered water pump for use in the field (so completely portable and no resources other than water). The main reason was to assist a friend in getting water out of a stream beside his allotment garden to water the plants, but I also fancied it as an interesting hobby project!
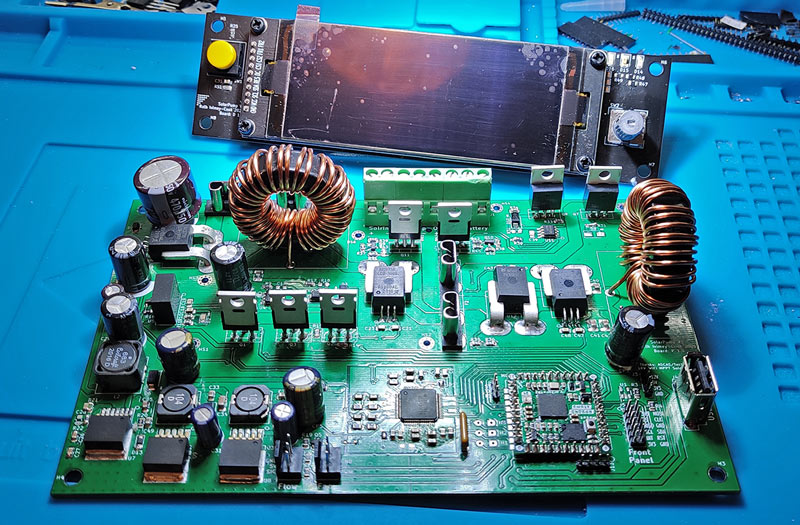
As part of that project I have learnt about switching power supplies and solar panels, pcb design and testing, and more. This is the prototype PCB:
The project basically involved an Maximum Power-Point Tracking (MPPT) front-end for the solar input, a battery storage phase (required even when there's enough sunlight), and an output stage to power a suitable water pump. While MPPT units are available commercially they are usually expensive, and initially I thought I could do something good enough somewhat cheaper. The costs of getting to the point of making it, however, have made the project rather more expensive!
The project had several sub-goals:
- To monitor the flow of water over time, so as to know how much water has been transferred (both total and in a session);
- To make the most of the solar power input, which the PWM converter that formed part of v2 definitely doesn't do.
- To provide a nice easy-to-use display showing what's going on;
- To be easily portable (e.g on a bike or hand-held);
- To enable the power output to the pump to be adjusted so as to speed up or slow down the pump depending on requirements.
All this is of course a prelude to the main content of this post, which is about building the battery, and in particular why?
Well, there are some constraints on the system:
- The commercially available pumps have nominal voltages of 12V or 24V, and at the lower end just 12V;
- Solar panels in the 80W+ range typically have an open circuit voltage of ~20-22V and MPPT voltage in the 18V area;
- The battery voltage must be lower than the solar MPPT voltage unless a boost converter is used, which complicates the build, and the battery voltage must also be comparable to the pump voltage for the same reason.
This led me initially to selecting 12V pumps and 18V (nominal) solar panels. While a 12V lead-acid battery will work in this situation (the 12V is "nominal" and the load voltage is usually 12.2 to 12.8V) experience with version 2 of the solar pump build showed that light-enough lead-acid batteries could not supply sufficient charge for the 12V 6A pump motor, so a Li-Ion battery was called for.
Li-Ion batteries are usually built from single 3.7V (nominal) cells grouped in series and those series groups in parallel to make up the required voltage and current capacity. The most common cell size is called 18650 (an encoding of its size, 18 ⨉ 65mm), somewhat larger than an AA cell (14 ⨉ 50mm). Such cell groups are described as so many in series (S), and so many in parallel (P). For example, 2S3P means 2 cells in series (so 3.7 ⨉ 2 or 7.4V) and then 3 of the 7.4V groups in parallel. If you were using commonly-available 2000mAH cells, that would make a 7.4V, 6000mAH battery.
In my case, I wanted ~13V, so while a 3S battery is sometimes called "12V" it is actually only a nominal 11.1V. Now, the 3.7V is a nominal value, and the voltage varies from about 4.15V fully charged (3S=12.4V) to 3.1V empty, but you only get 4.15V for a short period, and 11.1V wasn't going to cut it for me. So 4S it was: nominal 14.8V, max 16.5V, min 12.1V. This would be fine, 16.4 being less than 18V for charging, and higher than the 12V nomonal at the pump.
The only downside was that I found 4S batteries are quite rare, 3S or 5S being much more common, and so while I found a couple of sources, in the end I decided to build rather than buy. My first version was 4S3P using 12 ⨉ 18650 cells rated at 3300mAH for a 14.4V, 9.9Ah battery, but after experimentation I decided to add another parallel group for a 4S4P, max 13.2Ah capacity.
Soldering Nickel Strip
The main barrier I (thought I) faced is that the terminals on batteries are usually nickel, which is said to be hard to solder to given that you really don't want to heat up Li-Ion cells noticeably. So, I bought a spot welder for myself, specifically this model at £46:
I found it suitable for the job though just a little underpowered - several joints were not very solid to begin with until I told it to use its high power setting. However, it is good enough for the job. This unit claims 650-ish amp max power, and triggers that power just after a short circuit is detected, so no need for an additional activation switch. I found it relatively easy to use, with the exception that the leads are quite short. I presume this is to keep the wire resistance low. The leads & terminals do get slightly warm to the touch in use. I found it nice, safety-wise, that the leads can be completely removed from the unit while not in use.
Both the above welder and one of the protection circuits included nickel strips, so I didn't need to buy extras. I would emphasise the point that most of the smaller welders _will not_ weld strips thicker than 0.2mm and even that is difficult, 0.1mm thick being better, as you will get a safer joint. Too thin is also, obviously, bad. On that topic, I used a minimum of 4 spots welded, sometimes when several strips joining as many as 8, to ensure that the connection was safe and of low resistance. I saw some videos where people were just wandering along with 2 spots (the minimum) and I did worry that wasn't enough.
It is possible to get more advanced strip in a "ladder" style, suitable for use with the battery holders I used, and other strip suitable for groups of batteries tightly packed. I didn't use it in my build only because it was additional cost, but it would I think make the build safer (reducing the chance of a duff intermittent connection causing a fire) and also will simplify the build. The temptation to skimp on welds must be resisted, though!
Other Elements
After reading a lot, and checking many videos, I also bought some "fish paper" for insulation (though this one is sticky-back and I wanted plain). I used this mostly to protect the exposed ends of the finished battery to prevent shorts:
and some battery clips to hold the batteries securely - (it's considered good to allow airflow around the batteries to aid heat dissipation):
and some terminal protectors -- highly recommended to include something like this or risk shorts as the negative terminal is only a few mm from the positive at one end:
Finally, Li-Ion batteries need to include a charge/discharge protection circuit, of which there are many to chose from. I started with:
but decided it was too flimsy for my liking (both very thin PCB/copper and what looked like quite low power components), so bought this one instead:
which is more substantial. I have no idea if in fact the other one was suitable, but feel happy with the decision.
Many battery builds include wrapping the whole in heat-shrink plastic (often blue, for some reason), but after my research on the topic I decided against that considering that although it might keep unwanted things out, it will also keep any temperature build-up inside, where it can most easily cause thermal runaway. Again, I am unsure who is "right" on this.
In my build I included a thermistor in the centre of the unit, so my electronics can monitor battery temperature. Ideally you want more than one, but one is probably enough. There's not much space inside, so plan it during the build.
Mistakes
Finally, one mistake I made was to not "balance" the batteries individually before joining them up. This process brings them all up to the same charge level (as evidenced by voltage) so when they're joined they move up & down as a group. If you don't do this you end up shortening the life & usefulness of the completed battery, and the job can't be done properly after the event. Ideally the individual batteries need to be within 0.02V of each other, definitely within 0.05V, to begin with.
Add new comment